Multi-Bite
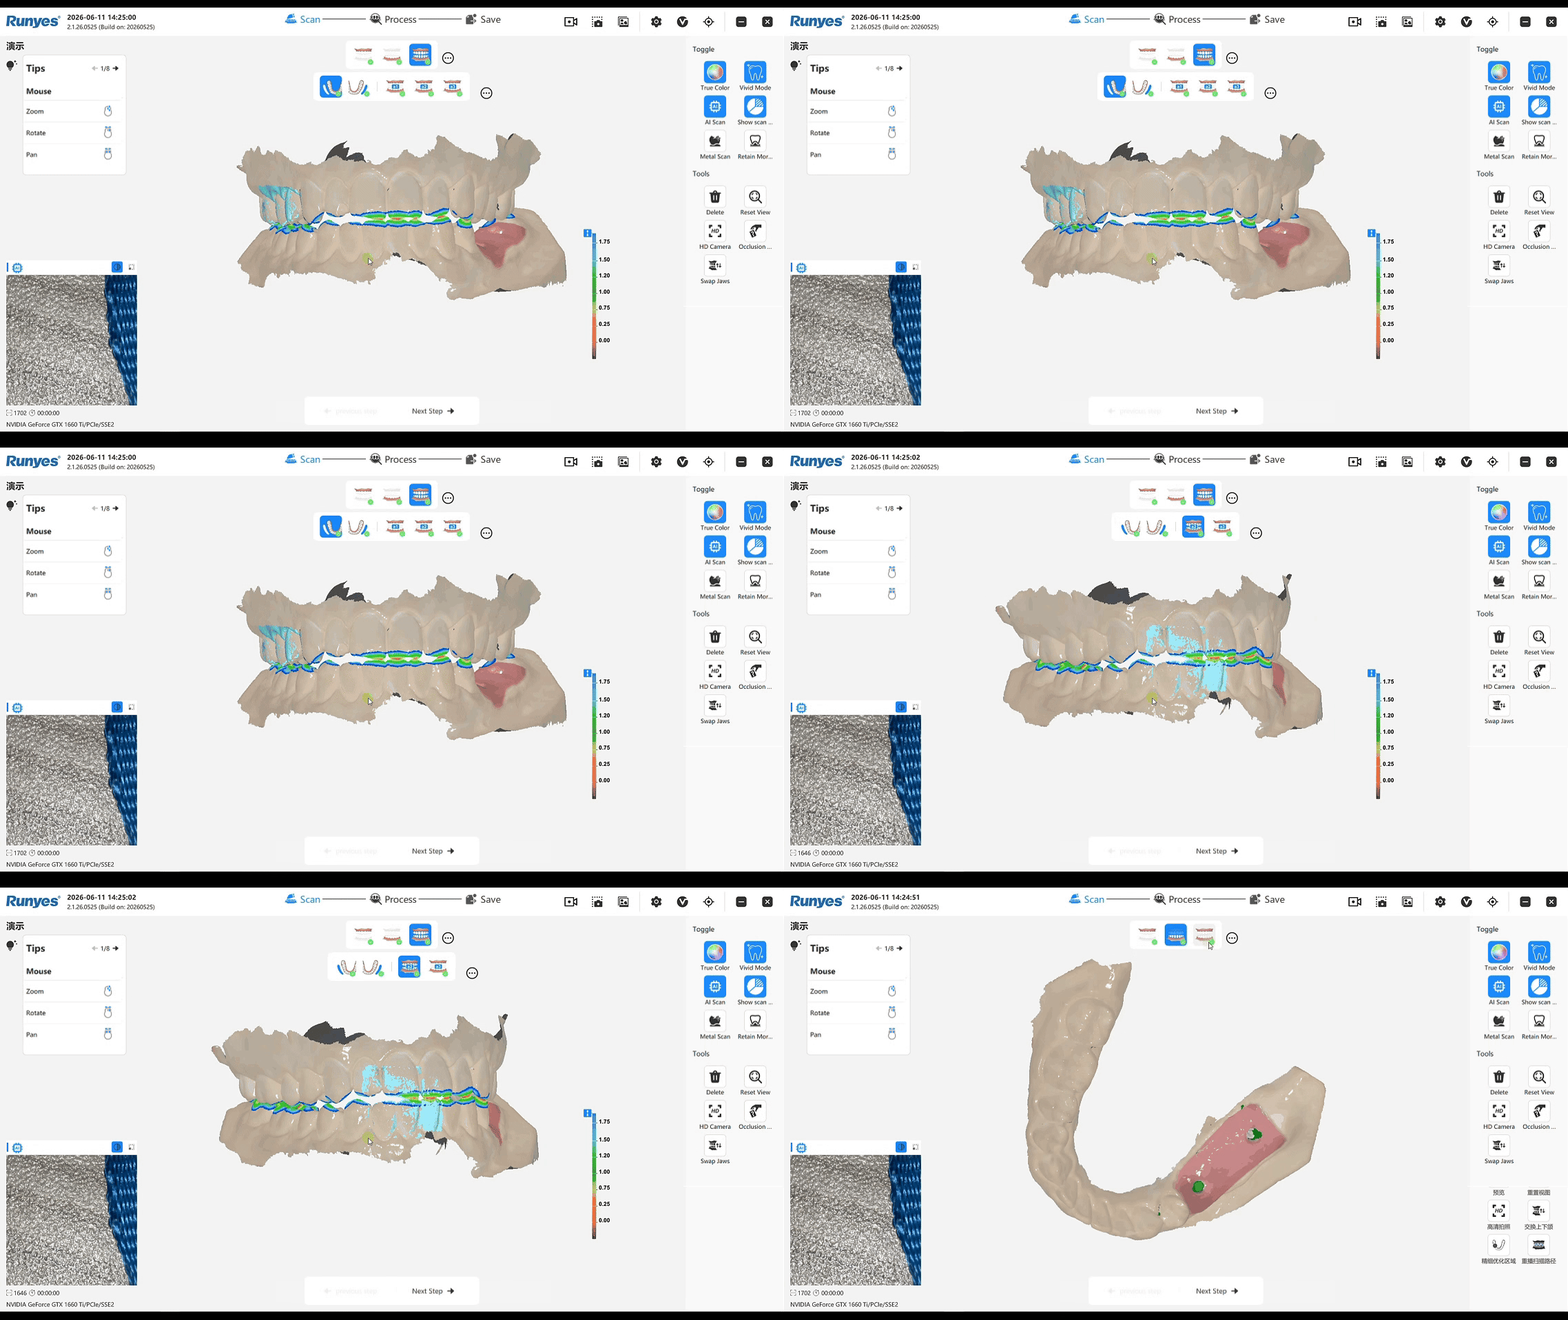
The Multi-Bite feature allows multiple occlusal relationships (such as protrusive and lateral positions) to be recorded within the same case, enabling analysis of occlusal contacts under different jaw positions.
The Runyes Intraoral Scanning System supports:
- One standard occlusion record (Maximum Intercuspal Position, MIP) consisting of left and right buccal bite scans
- Up to 3 additional bite records based on clinical requirements
- A maximum of 4 bite datasets per case
Note: Exported data is aligned and exported using the standard occlusal orientation by default.
Data Storage and Naming
Multi-bite scan data is stored within the current case. During export, users may choose either ZIP package or folder format.
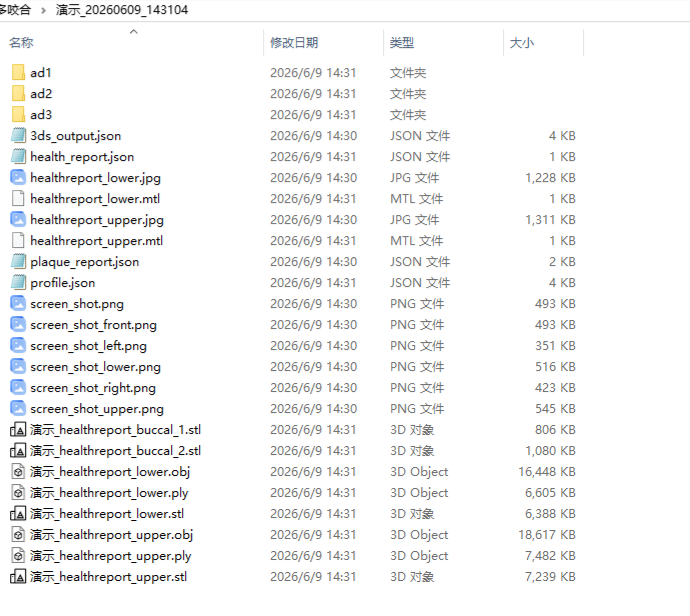
After export, a case folder (customizable name) will be created in the selected export directory. The following example uses the folder name "Demo_20260609_143104".
| Bite Record | Storage Location | Description |
|---|---|---|
| Standard Occlusion (Group 1) | Demo_20260609_143104 | Left and right bite scans, _buccal_1.stl, _buccal_2.stl |
| Additional Bite Group 1 | Demo_20260609_143104/ad1/ | _buccal_ad1.stl (supplementary scan of left/right/anterior/posterior regions as needed) |
| Additional Bite Group 2 | Demo_20260609_143104/ad2/ | _buccal_ad2.stl |
| Additional Bite Group 3 | Demo_20260609_143104/ad3/ | _buccal_ad3.stl |
Note: The folders
ad1,ad2, andad3are automatically generated during export and are located within the case folder. Each folder contains the exported data for the corresponding bite record, including.stlmodels and.jpgtexture files. The.jsonconfiguration file is stored only in the root directory of the case folder.
Clinical Applications
- Cases requiring protrusive jaw position records (e.g., anti-snoring appliance fabrication)
- Cases requiring lateral jaw position records (e.g., occlusal splint fabrication)
- Prosthetic design requiring multiple jaw position references
- Orthodontic occlusal analysis
Workflow
1. Preparation
Before performing a multi-bite scan, complete the full maxillary and mandibular scans.
2. Record the Standard Occlusion (MIP)
- Enter the Bite Scan stage.
- Ask the patient to bite in Maximum Intercuspal Position (MIP).
- Complete the standard left and right bite scans.

3. Add a New Bite Group
- Click the More Menu button next to the left/right bite scan area.
- Click the "+" button in the dialog box.

4. Capture Additional Bite Data
Capture additional bite scans according to clinical requirements.
Common supplementary scanning methods include:
- Left-side bite scan only
- Right-side bite scan only
- Anterior bite scan only
- Selected posterior segment bite scan
Procedure
- Guide the patient into the desired jaw position (e.g., protrusive or lateral position).
- Scan the required bite area.

Tip: If manual bite alignment is required, select the reference bite dataset and click Manual Bite Alignment in the right-side toolbar. Select three corresponding points on the maxillary scan, mandibular scan, and bite scan for alignment. For more information, refer to Manual Bite Alignment (link to be added).
5. Add Additional Bite Groups
Repeat Step 3 and Step 4 as needed.
Up to 3 additional bite groups can be added.
6. Delete Bite Groups
The deletion workflow differs depending on the bite type.
Delete the Standard Occlusion (MIP)
- Enter the Bite Scan interface.
- Click the Delete button in the right-side toolbar.
- Confirm deletion.
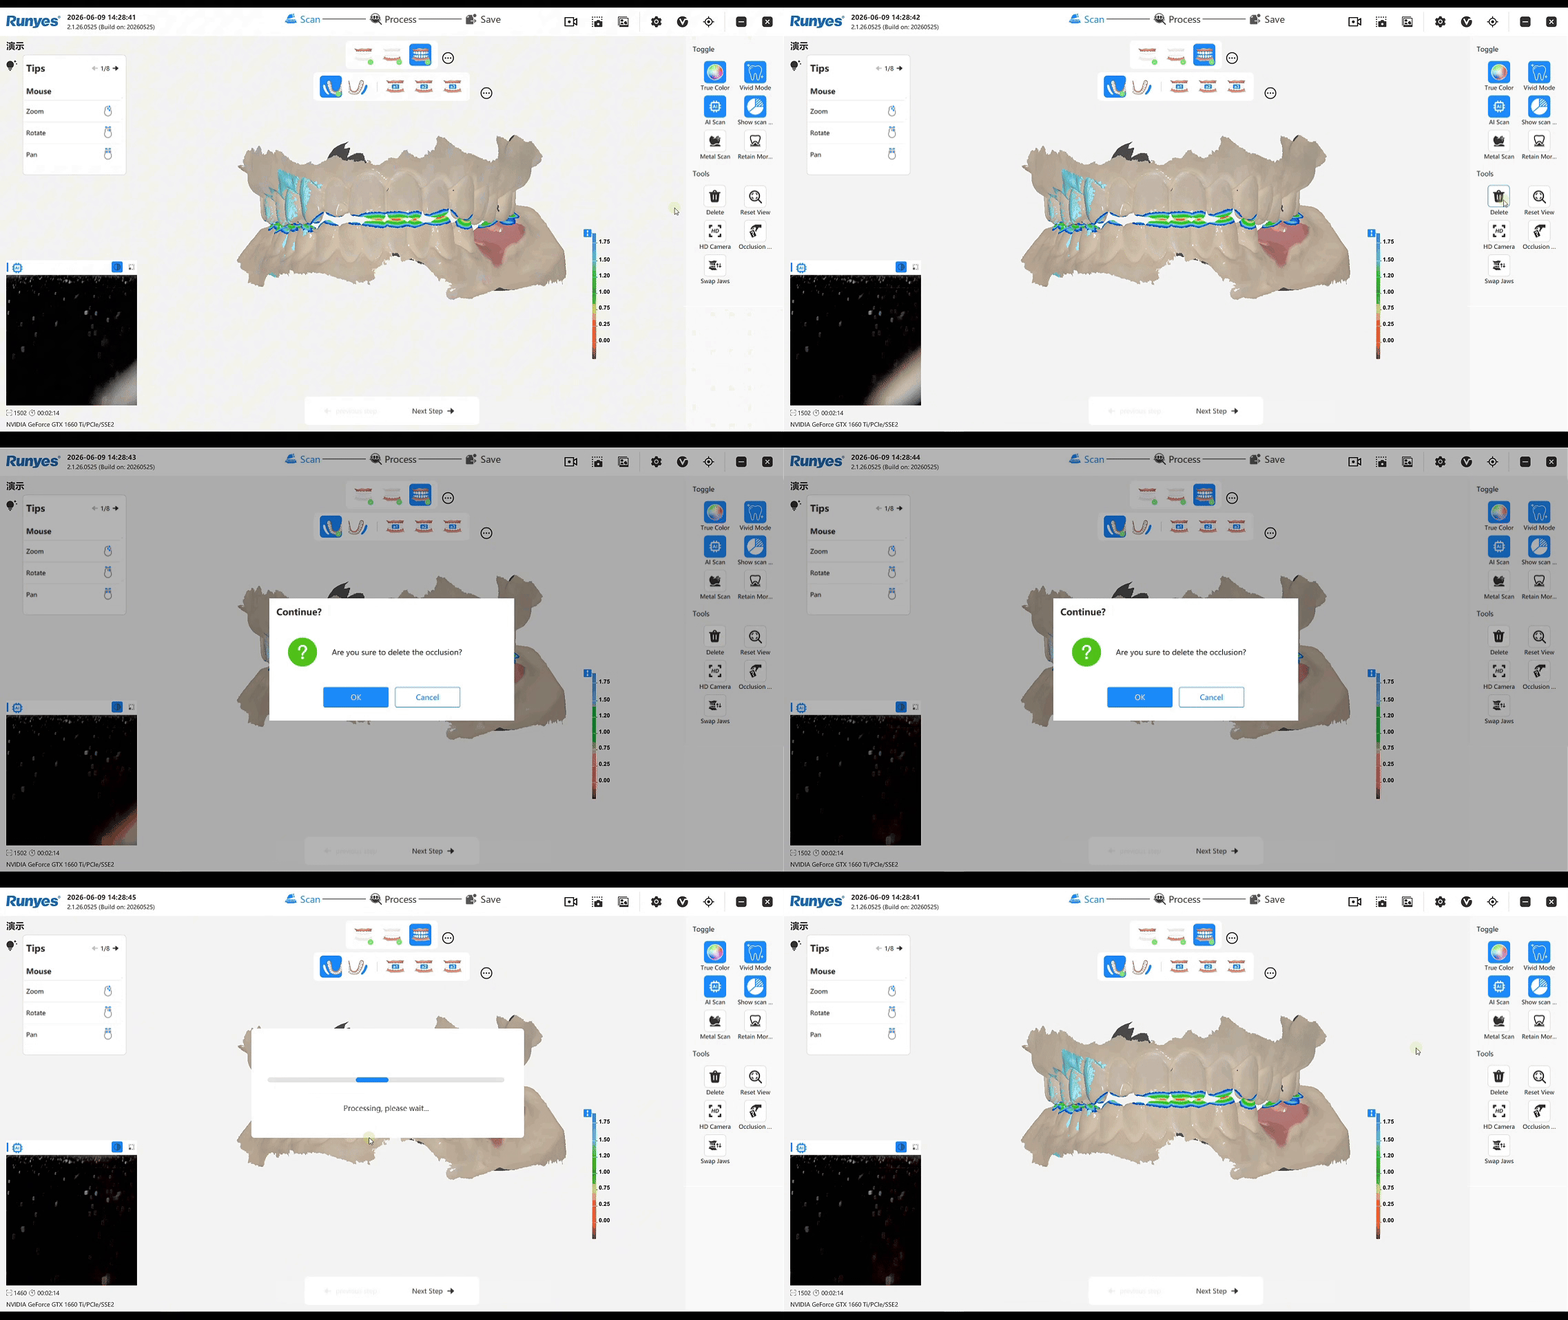
Note: Deleting the standard occlusion does not automatically delete any additional bite groups. Additional bite groups must be deleted separately.
Delete an Additional Bite Group
Method 1
Use the same procedure as deleting the standard occlusion.
Method 2
- Enter the Bite Scan interface.
- Click the More Menu (three dots) next to the left/right bite scan area.
- Locate the desired additional bite group. The previous "+" button will appear as a Trash Bin icon (🗑️).
- Click the Trash Bin icon.
- Confirm deletion.